With the chickens coming, it was time to get the coop built.
The plan:
I felt like the “ready made” chicken coops that were cute (because my chickens need pretty things) were also too expensive. So I decided to make my own out of a playhouse.*
Luke told me I could have 8 chickens, which means I needed at least 40 square feet of coop space and 64 square feet of space for the run.**
But, then #ChickenMath and BOOM! I had 16 chickens on the way. To make space I opted for the 13×10 run from BESBLEE with a climbing ladder from MEETWARM and two KidKraft playhouses.


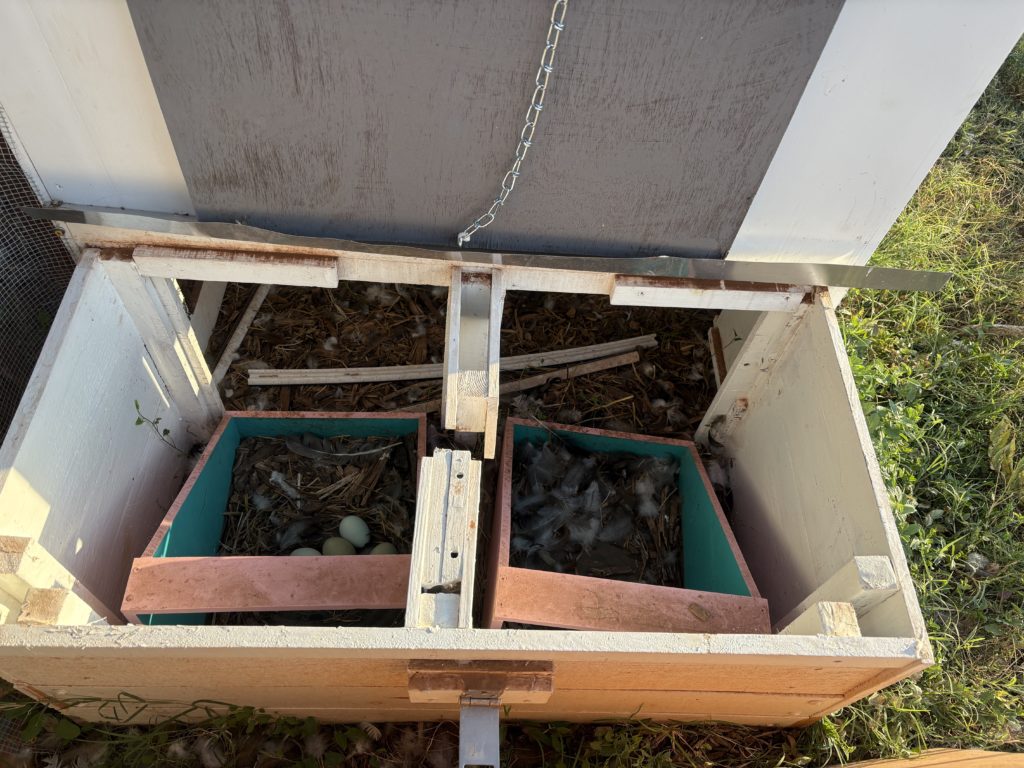
Instead of having a table and bench (my chickens aren’t that fancy) I reused the wood included with the kit for the table, added some extra wood to fill in the space, cut a hole into the main structure and turned the space into the laying eggs. Since it’s protected, dark, and private, it makes a perfect location for the laying boxes. Each laying area can hold two CSQOO nesting boxes.
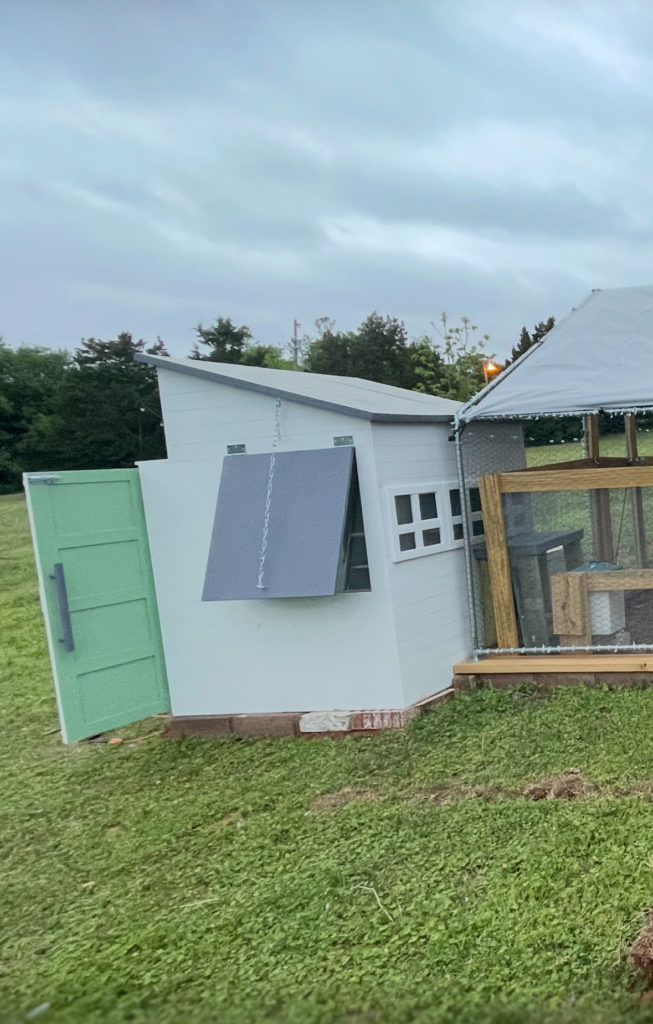
Another modification I made was to protect the playhouse windows with hardware cloth and to make window coverings on the larger, side windows. I can raise and lower these, depending on how warm it is outside, while leaving the east and west-facing windows uncovered (though still protected with hardware cloth) for ventilation.
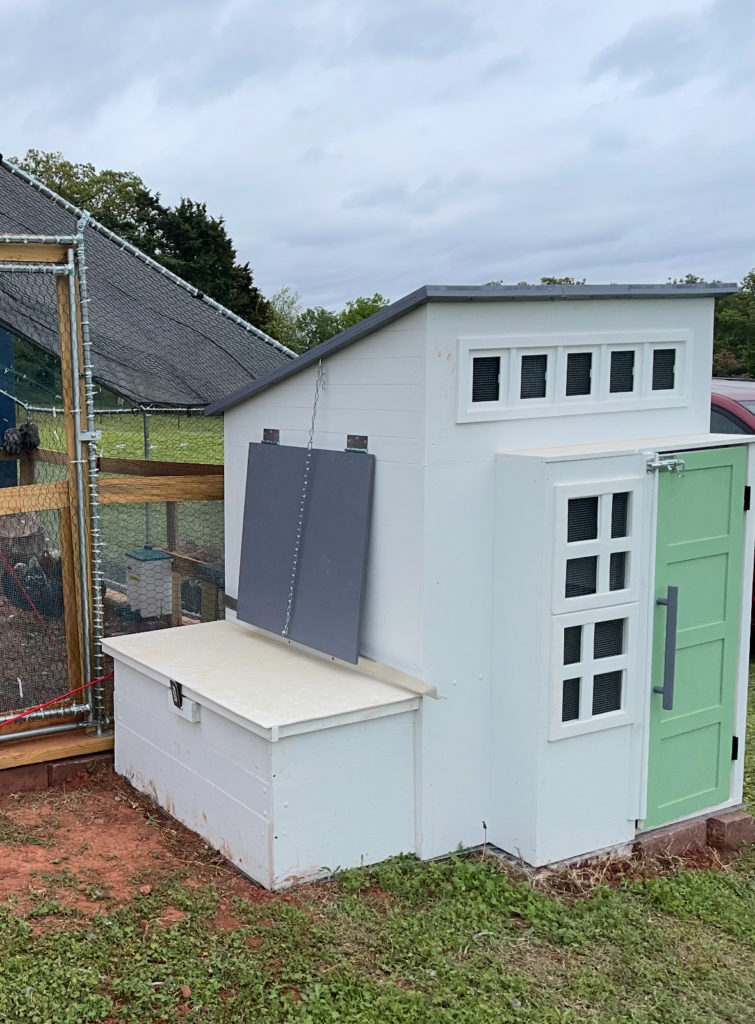
Inside the coop I installed roosting bars. This was harder than I thought as the bars would only fit on the entry-door side of the coop and I wanted it on the roosting box side. But a little work with the jigsaw and some leftover, repurposed screws and it worked out pretty well.
To attach the coop to the run, I cut a door in the back of the coop. But, after looking at the slope of the roof, I was afraid the poor chicks would get wet going and out of the coop during a heavy rain. Using more leftover pieces of wood, I added on a covered porch and attached the green mesh (that comes with the run) around the door to keep predators out.
I also used the staple gun to attached more hardware cloth to the bottom side of the coop and put them on paver blocks, which should keep predators from digging in to the coop.


I was sure a raccoon would be able to dig under the run structure so I laid a “foundation” of pavers topped it with wood.
From my initial research I thought another area of vulnerability was the lower level of the run. To reinforce this area I used the bottom, wood frame, and created a 3 foot tall inner fence. To this frame I attached 3 foot by 10 foot section of hardware cloth.


I added a little “door” sculpture in the back– I had wood left over and thought I might add a sign in the space or something. What I didn’t expect was that this would become one of the chicks’ favorite roosting locations. They would gather there to sleep during the warm summer nights.


Somethings I would have done different:
Building Site
I would have made the coops on site. Instead I made it in my garage (January is too cold for building outside) and then had to rent a Uhaul to transport. (See footnote about the increased cost of this DIY coop).
The Front Door
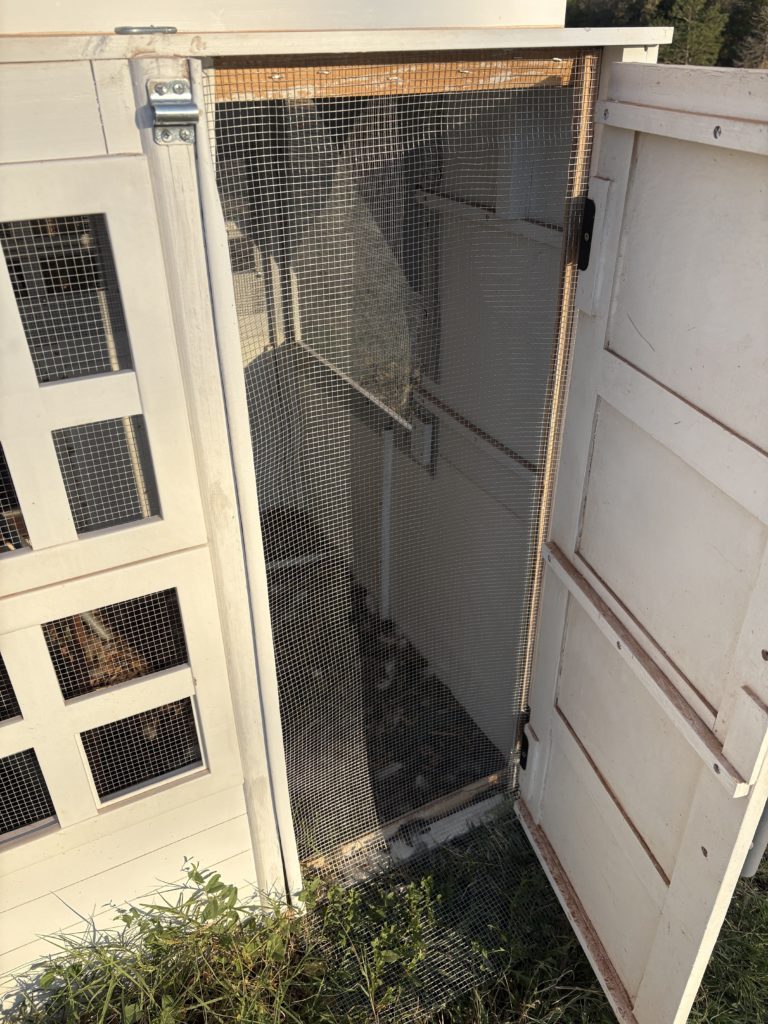
The playhouse door was designed for, well, a playhouse, not for protecting chickens. I tried to fix the gaps with weather stripping and a door framing kit, but after coming face to face with a snake inside the run, and after waging war with a raccoon, I decided to reinforce the door with hardware cloth (what can I say, I was on a bit of a rampage). The door covering is not attached at the bottom. It’s held down by the closed door. When I need to muck out the coop, I can roll up the protective barrier.
Not Trusting The Green Mesh or Zip Ties
The Raccoon outsmarted me in the end. He ate through the zip ties, killed 8 of my chickens, and left the dead bodies for me to find. The green mesh and zip ties were not enough.

To protect the girls, we created a hardware cloth fortress that we laid over the green mesh and secured together with screws, washers, and nuts. It was time consuming to make and a beast to put up as an afterthought. I think if we’d used hardware cloth from the beginning, the implementation would have been easier.
Overall, for a project I made up in my head, I’m pretty pleased with how it ended up.
*In the end, especially after having to reinforce it as protection from the raccoons, I spend way way more than the prefab ones. #Oops.
**Factored on 5 square feet per chicken for the coop and 8 square feet per chicken for the run.
